Today was a wash out - wash out of dye, that is. I had 3 things batching over night that I showed you yesterday - the shibori pole wrap, clamped piece and napkins. The napkins weren't as dark red as I wanted so after rinsing I put them back in soda ash and then back in the dye pot with some additional dye. The pole wrap looks much better now - more balanced, and the clamped piece (circles) is interesting.
I finished my "row" from Keepsake Quilting's pattern. The pattern is only 4 blocks; I added a third Yankee Puzzle block because I felt it looked more balanced, and plan to use it as a table runner instead of part of a quilt, so length doesn't matter.
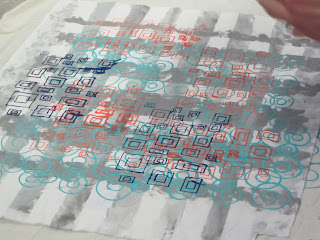
I was going to layer my Artistic Artifacts row for quilting, but decided I wanted to add a border to make it a little wider. Since I didn't have a piece I felt worked, I decided to print my own. I had a piece of hand-dyed orange, and wanted to add texture and/or print. I started by printing an all over design with discharge paste, which takes color out when heated with an iron.
On the left I've applied the discharge and started to iron the bottom corner; on the right is what it looks like after ironing. Then I went back to the print table and screened another image over top. But I forgot to take a picture so I will share that tomorrow.
What else did I do today? I made a peach pie; that's my assignment while I'm here - a pie a week!
I put together a small collage in neutral colors and machine quilted it, then put it in a dye pot - the leftover cobalt blue. The dye is not full strength, so I'm hoping it will turn out a paler color than the piece with circles above. This is a process we saw on a Quilting Arts video called Quilting and Dyeing Serendipity.
And finally, a little bit of a sunset.
Tomorrow, another road trip!


