Pages

Showing posts with label batik. Show all posts

Tuesday, July 23, 2013

Leaving Quilt Camp 5

Time to head home tomorrow - wrapping up quilt camp for another year.  Here's a selection of photos - more specific posts will follow after I get home!
 
My supplies are packed and work table is mostly cleared off;  above is a shot of 3 weeks worth of dyed & printed fabric, shirts and scarves.  Yummy colors!

We made lots of scarves, mostly dyed and printed with thermofax screens.  Above are some examples.
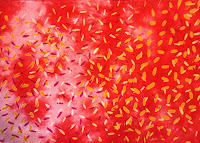
 I tried batik again, armed with the knowledge gained from an April class in Indonesian batik.  Very pleased with the piece on the left.  The right photo is a print from a thermofax screen that I drew.  Happy with that too.
We watched lots of Quilting Arts DVDs, one was Fusible Art Quilts with Frieda Anderson and  Laura Wasilowski - this is my attempt at a fusible art quilt a la Frieda Anderson.  Press on!
Finally, a shot of one of Barbara's day lilies, and a pretty sunset - not our last night since it was a rainy day, but one of the best of camp.  


Wednesday, April 24, 2013

Batik Show & Tell

Here are a few shots of class show & tell.


And some of the spectacular work of our instructors.


Monday, April 22, 2013

Batik Day 2


This is another piece from day 1.  After the first waxing it was dyed yellow.  The white is the first waxing with tjaps.  What remains yellow is the second waxing after which it was over-dyed red.  I think this piece is successful; I really like it.  
Here is the blue piece from day 1.  It too was waxed a second time (the leaves) and then over-dyed in red as well.  So all the white lines from the first waxing are now red, and the overall color is purple. What remains blue is from the 2nd waxing.  I was less pleased with this outcome, so I made a new blue piece with the same pattern.

Here are 2 more pieces from day 2; both have only 1 waxing - no time for a second layer.   I really like this teal blue color.
We also had some homework after day 1 to create a personal motif and draw it on our fabric.  So on day 2 we also waxed (by hand) and dyed this piece.  The first dye on this was a pretty coral-orange color.  I wanted to dull it some, so over-dyed in black to get this rust color, but now its duller than I wanted and the coral is less vibrant.  Oh well, lessons learned.  It actually doesn't look too bad in the photo.

Tomorrow - pictures of classmates creations!

Sunday, April 21, 2013

Indonesian Batik Workshop

I was very fortunate this past week to be able to participate in a 2-day batik workshop at Artistic Artifacts with Indonesian batik artists Agus Ismoyo and Nia Fliam.  They are in the US for the opening of an exhibit in which they are featured, Out of Southeast Asia,  at the Textile Museum in Washington, DC. It was a very full 2 days, starting with learning about the ancient creative process of batik, symbols that form the basis for traditional designs, and getting in touch with our own creative source.  We started by learning to create designs by hand with the tjanting tool seen here is 3 sizes.


Ismoyo instructed us in the techniques for using tjaps. the copper tool used for stamping batik designs.  The wax pan has a layered pad in the center (copper, wire screening, and several layers of fabric); the tjaps are placed around the outside of the pan to heat, and tapped on the center pad to coat it with wax that is then applied to the fabric. The fabric is placed on a foam pad that is saturated with cold water, so when the hot wax on the stamp is pressed into the pad, it immediately solidifies.


After the wax is applied, its time for dyeing.  They use napthol dyes which is a different process than we use in the US.  There are different pre-soak base mixtures that determine the color resulting from the color solution.  Its all very confusing!  After dyeing and a 15 minute post-soak, it goes into boiling water to remove the wax and then a cold water rinse.  The colors are rich and fabulous!


Above are my first 2 pieces from Day 1.  The red one is my "doodle" piece, learning to use the tjanting tool.  The blue piece has a hand done border, with a stamped tjap design in the center.  The blue piece was waxed again and over-dyed the 2nd day. More pictures tomorrow.