Pages

Tuesday, July 23, 2013

Leaving Quilt Camp 5

Time to head home tomorrow - wrapping up quilt camp for another year.  Here's a selection of photos - more specific posts will follow after I get home!
 
My supplies are packed and work table is mostly cleared off;  above is a shot of 3 weeks worth of dyed & printed fabric, shirts and scarves.  Yummy colors!

We made lots of scarves, mostly dyed and printed with thermofax screens.  Above are some examples.
 I tried batik again, armed with the knowledge gained from an April class in Indonesian batik.  Very pleased with the piece on the left.  The right photo is a print from a thermofax screen that I drew.  Happy with that too.
We watched lots of Quilting Arts DVDs, one was Fusible Art Quilts with Frieda Anderson and  Laura Wasilowski - this is my attempt at a fusible art quilt a la Frieda Anderson.  Press on!
Finally, a shot of one of Barbara's day lilies, and a pretty sunset - not our last night since it was a rainy day, but one of the best of camp.  


Tuesday, July 16, 2013

Ice Dyeing Tutorial

In the past when I've ice dyed, I made a "parfait" of layered fabrics/shirts/scarves in a container with ice and powdered dye between each layer.  That method works fine, but whatever is on the bottom gets the darkest and greatest mix of color.  For a little bit more control, I've adapted another method, similar to the process I've used with snow.  (For that, I've used a plastic mesh tacked to a wooden stretcher strip frame over a plastic kitty litter pan.)

I found that a mesh grapefruit bag stretches to perfectly fit an 11 x 15 inch kitty litter pan, like a sleeve.
I just stretch out the mesh bag (both ends are cut off) and slide the pan inside. Securing at opposite ends with clothespins (binder clips would work too) pulls it taught enough to hold the weight of the fabric and ice.  The piece of fabric in the bottom of the pan is ready to catch the drips.

Layer your soda-ash soaked fabric or garment (about 1/2 cup soda ash per gallon of water, available from ProChem and Dharma Trading Co.) on top of the mesh, layer with ice cubes or crushed ice, and then sprinkle your dye powder on top.  Be sure to wear rubber gloves and a protective mask when handling dye; I use MX Procion fiber reactive dyes (available from the 2 sources mentioned above, or a local art supply store such as Artistic Artifacts in Alexandria, VA).  With this method, you can still layer 2 items on top of each other, or place them side by side.  I like to scrunch my fabric to get a mottled pattern.  Depending on the size of the items, you might be able to do more.
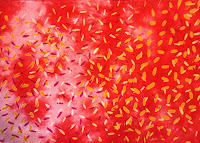
 The 2 photos above show a shirt and scarf placed on the pan, then the ice and dye on top.  The ice should completely cover the items you are dyeing.  The more ice you use, the more it will dilute the colors.  For this project, I wanted, soft, mottled colors.  I used yellow, coral, and turkey red.  Start with your lighter colors first or they won't show up in the finished product.
 Here you see the ice melting into the pan below; as it does so, the colors seep into the fabric.  The ice causes some of the colors that make up the dyes to separate and form interesting patterns.  When you do this process by the parfait method, whatever item is on the bottom would be sitting in all the liquid, so it will be darker and more solid than pieces on the top.
This is the t-shirt spread out a bit after the ice has melted and it continues to "batch".  I let things set at least 24 hours before rinsing out.  Rinse in cool water till the water runs almost clear, then hang to dry.  After drying (they don't have to be completely dry), wash your items in  hot water with Synthrapol (to remove excess dye).  I also like to throw in a color catcher to pick up excess dye - they turn beautiful colors and are great to use in mixed media or collage projects, and are especially good for screen printing or block printing.
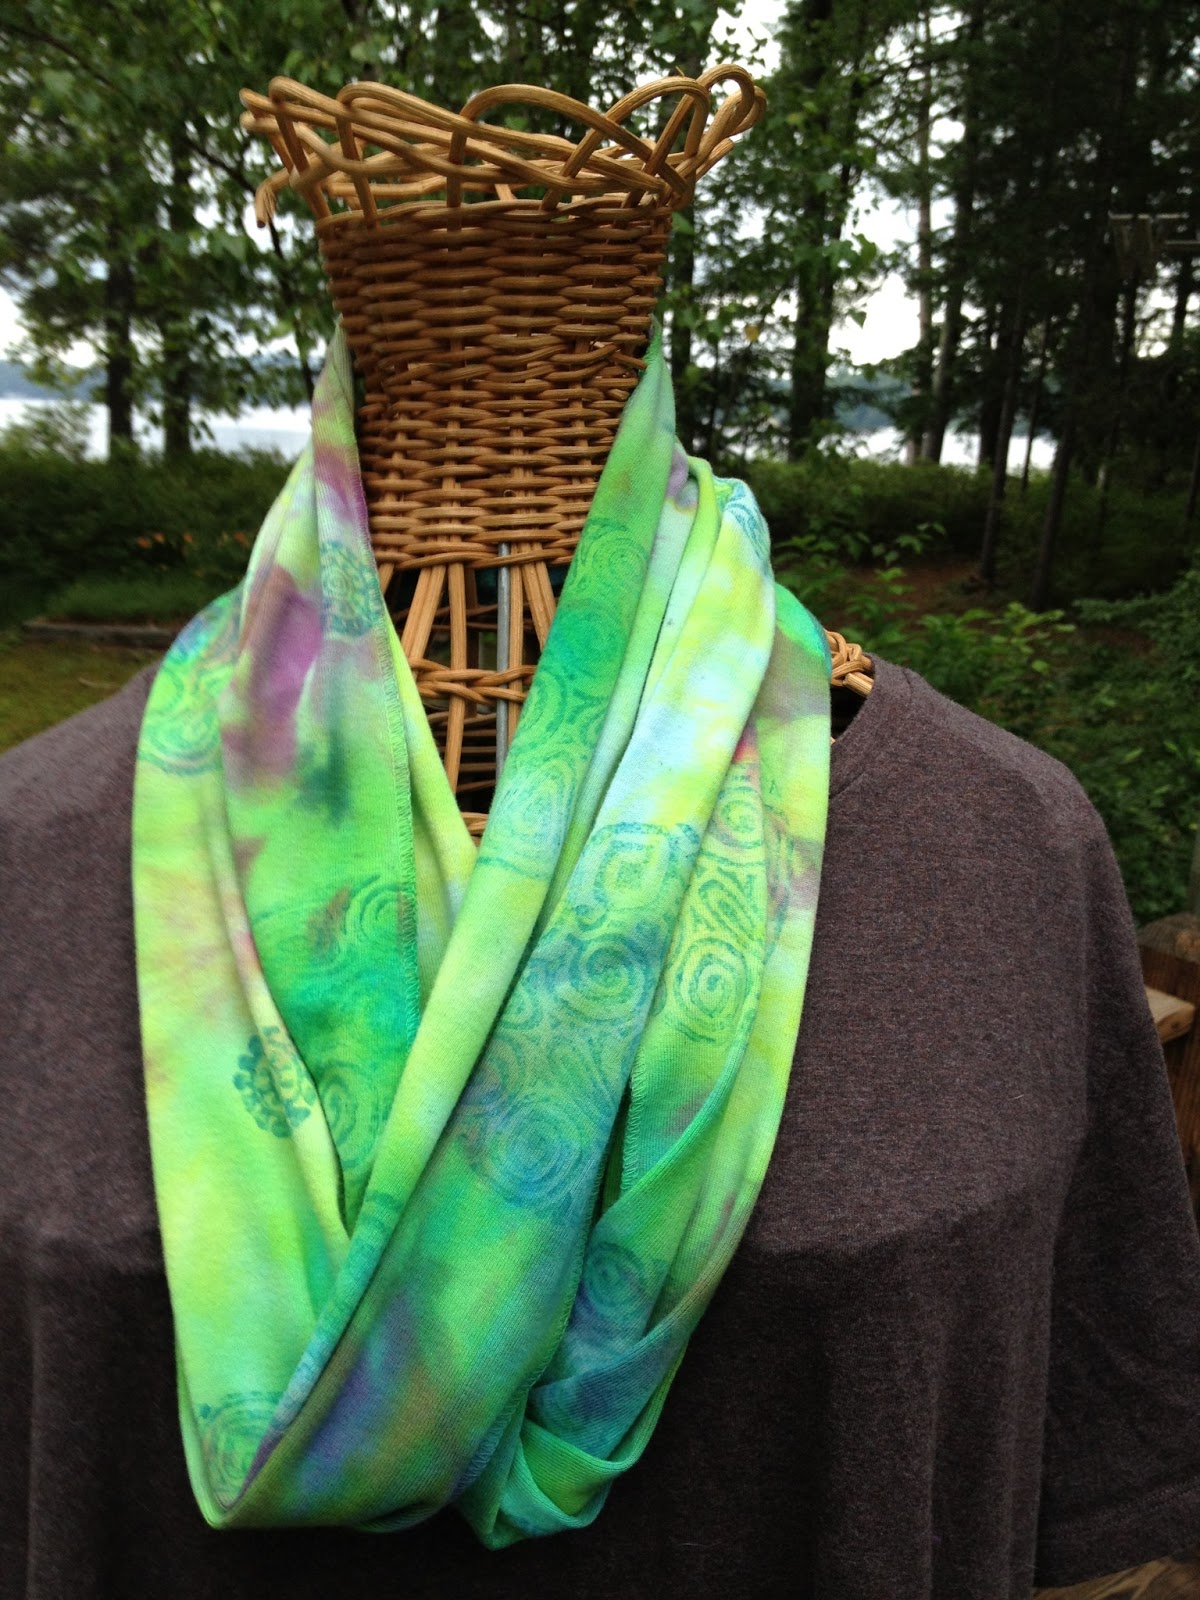
Here are the 3 items from this dye session hanging to dry - t-shirt, fat quarter that was in the pan to soak up the dripping dye, and a bamboo rayon scarf.  I am happy with how these colors turned out - it's always a bit of a surprise, but that's the fun of it!
 

Saturday, July 13, 2013

Quilt Camp Update

We have been busy campers here at Merrymount.  The studio (aka garage) is buzzing with activity (and bugs).  The sun has come out again after several days of rain and clouds.  Here's what we've been up to...more dyeing, more screen printing, breakdown printing, wood block printing, printing with thickened dye...that's the outdoor stuff. 


Indoors, we've been busy making more thermofax screens and doing some sewing and embroidery.


 Molly the mannequin is very busy modeling silk scarves that we have printed - she's got one for every day of the week!
Last but not least, here's some breakdown screen printing and prints to try out a new thermofax screen.


Thursday, July 11, 2013

Winter Oaks

In my last post, I mentioned that I would show how I got from point A to point B of the piece I am calling Winter Oaks.  It started as a workshop called Fractured View and looked like this.
 Rather than leave it like this, I decided it needed something more.  It reminded me of bare winter trees, and I thought a brightly colored bird would serve as a focal point.
 I found an image of a cardinal that I drew to make a thermofax screen and printed it in black on a piece of red fabric.  Then I added wonder under to the back before cutting it out so I could fuse it in place.
I also knew I wanted leaves. I took a piece of tyvek and painted it with browns, copper, and silver colors to resemble decaying leaves. Since I had a photo of an oak leaf that I used to make a thermofax screen, I traced the leaf to make a template to cut out the tyvek leaves.  The cool thing about tyvek is that when you iron it (carefully) between layers of teflon pressing sheet, it shrinks and shrivels.  The more heat you apply, the more it shrinks.  So I made a bunch of tyvek leaves.  Then, I was using some TAP (transfer artist paper) for another project, and realized I could make some leaf transfers as well.  Those are the ones on the left.  Now I needed some smaller branches to fill in a bit and provide a place for the bird to perch.  I fused wonder under to some leftovers of the fabric, cut random lengths & widths and fused them in place.
After placing the bird, I started playing with the leaves, ironing the transfers on first, then pinning the tyvek leaves.  While the tyvek leaves were still pinned, I screen printed a few more (not visible in this picture) and also added a few with discharge paste through the screen.  My intent is that the quilting will make those leaves visible.  I layered the top with batting and stitched down the tyvek leaves.
The backing has been added and is ready for quilting.  More pictures later when it is finished!

Tuesday, July 9, 2013

Quilt Camp 5 Underway

Here we are on the shores of Lake Winnipesaukee for the 5th year of quilt camp!  (aka my friend Elizabeth's family summer house)  For anyone new to my blog, this isn't a real "camp", it's just what we call our annual summer play time to experiment with surface design, fabric dyeing and any other technique that piques our interest.  It's been a slow start with the creativity this year, we spent a lot of the first week taking care of some PG Fiber2Art business which ate up a lot of time.  But there were things that needed to be done, so that is good.  And we took a day last week to go the New England Quilt Museum in Lowell, MA, so now in our 2nd week we're getting into the groove and I'm finally getting a blog post up.  We've done some dyeing and printing, worked on some unfinished projects and started a few new ones.  Here's some of what we've done so far.
 This is a piece I started back in March in a VCQ workshop, so what you see above was done before arriving.  It's a technique called fractured view.
This is what I've added to it - I'm calling it Winter Oaks.  In a another post I'll show how I got from the 1st to the 2nd photo  It's now ready for quilting.

I wanted to try out some new colors of dye, so these are fat quarters to see what the colors look like.  The 4 on the left are low water immersion of coral, cobalt blue, turkey red and teal; the one on the right is ice dye using coral, yellow & turkey red.
 

The 2 pictures above are both practice using thickened dye with a thermofax screen.  The colors are not as intense as I'd like but I'm glad they didn't wash out!  The one on the left is done with one of our gear screens (over a piece of fabric previously used for breakdown printing which is what you see in the background); on the right, both pieces were printed first with a screen of a sewer cover and then some graphic rectangles.


Molly the Mannequin is modeling a circle scarf that I dyed last year.  I knew it needed something else but wasn't sure what. After taking a block printing class right before coming up here, I thought this wooden block print would be just the thing.  This is also done with thickened dye, so the hand of the fabric stays softer than with paint.

Stay tuned for more over the next couple of weeks.


Sunday, July 7, 2013

New Screens in the Etsy Shop!

I've added 4 new screens to the Etsy shop today.  If you've taken our PG Fiber2Art thermofax screen printing class at VCQ or Artistic Artifacts, you may have used some of these before, but now you can purchase your own if you are so inclined.  Head on over to the shop to check them out!  They appear at the top of the listings.  https://www.etsy.com/shop/PGFiber2Art  Here are a couple of samples.


Saturday, July 6, 2013

Passages - I Can Fly

Quilting Arts magazine recently had a reader's challenge to submit a 10 x 10 quilt based on the theme "Passages".  Since my submission was not selected  - they chose 12 out of 125 - I guess I can share it here.  Those odds are pretty low, so I don't feel too bad about not being chosen; I'm happy with how it turned out, regardless.  My quilt is a reflective piece about my daughter moving away from home to become an independent adult. When she was growing up, she used to say, "Guess what?" and I'd say, "What?"  Her reply would be "I can fly!"  I have no idea where that came from.  But thinking about this passage brought the memory back.  The text is done with thermofax screens of notes she wrote while away at college.  The bird and wings imagery complete the idea of nurturing a child until they are ready to fly on their own.  I look forward to seeing the challenge finalists' quilts in the October/November issue of Quilting Arts..


This piece is made on rusted cotton fabric with gelatin plate printing in the background, thermofax screen printing, Transfer Artist Paper (original photograph of robin and babies), and is machine quilted.